


Restaurants and cafés have been all over this trend for some time now, and more and more frequently they offer their customers elaborately prepared food and drink that is as photogenic as possible – from carefully layered fruit bowls to creative latte art, there are countless examples. When visitors then photograph them and share them online, restaurant and café owners are delighted, as they are getting free advertising for their businesses.
More and more often, those who enjoy cooking at home as a hobby also try to style their homemade food in such a way that they can shoot as appealing a photo of it as possible. Because the same applies here too: the more attractive the photo, the more attention it attracts, not just on social media but also in our recipe community! Click here to upload your AMC recipes and share them with other users. The more attractive the image of your recipe is, the more clicks it will get from other enthusiastic fellow cooks. Beautiful photos make mouths water and inspire other people to cook the recipes too. If you like to showcase your food and you want to know how you can take professional-looking food photos in just a few simple steps, then you’re in the right place – we’ll give you all the tips and tricks in this post!
Show off your plate – how to showcase your food properly

These days, it’s all about food – and increasingly so. Particularly since the emergence of social media such as Insta-gram and Pinterest, we can see what’s on the menu for our friends, acquaintances or our other connections every day. The reason is clear: more and more people are taking photos of their food and posting them online. We’re quickly moving from “the way to the heart is through the stomach” to “we eat with our eyes”. Now, whether a plate of food looks visually appealing often seems to be just as important as whether it tastes good.

The right tools
You don’t need a professional SLR camera to take beautiful photos! Standard smartphones now have really good cameras, and it’s so easy to take bright, sharp photos using them. You don’t need complicated editing programs like Photoshop either. There are now lots of easy-to-use image editing apps that can be uploaded to your smartphone for free. For example, they let you edit the brightness, contrast and sharpness after the photo has been taken or apply filters to give your photos that certain something extra.
The right technology
If possible, use natural daylight and avoid artificial light from light bulbs and fluorescent tubes. If possible, photograph your dish during the day and close to a window so that your photos look as bright as possible. Try not to take photographs in direct sunlight and avoid shade on your plate through indirect rays of sunshine.
If you wish to create light reflections or brighten up certain parts of the image, you can work with small mirrors or spots of light using a flashlight. A fun tip to try: You can use the inside of a box of chocolates to create light reflections (and it also gives you a good reason to eat all the chocolate before you take your photo).

You’ve probably noticed that food photos aren’t always taken from the same perspective. For example, some photos are taken from a bird’s-eye view, i.e. from above. Such photos give a good overview of the plate and the immediate vicinity of the plate.
Alternatively, you can also take a photo of your dish from the side from a 45° or 90° angle. You should use these angles if your recipes aren’t easy to recognize from the bird’s-eye perspective. The 45° or 90° perspectives are suitable for foods like creamy desserts in tall glasses, burgers, sandwiches or multilayered cakes. Try a few different angles and see what looks best.

If you want to work with sharpness and blur, you need to arrange the objects in your photo in such a way that they are at different distances from the camera. If you put the focus on a certain area of the image, you can give this area extra emphasis. Most smartphones allow you to simply touch the part of the image on the screen which should be in focus, and it will automatically look sharper, whereas the rest of the image will become more blurry.
But be careful! Only use this function in moderation, as the sharpness/blur effect can also quickly reverse and make your photos look washed out and unclear. Make sure that the element of your dish that is important to you is the central focus of your camera and looks razor-sharp.
Decoration
To give your motif – the finished dish – that certain something extra, you can set your plate off with various decorative elements.
Put your plate on an attractive base, for example, a rustic wooden board, a colorful table set or a tablecloth. If you want to use a tablecloth, you should iron it in advance so that no creases are visible on the photo.
The photo looks more authentic if you place cutlery and a glass next to your plate (it looks best if you have filled the glass with your drink). A napkin can also add an interesting touch.
A variety of decorative elements add exciting highlights to the image.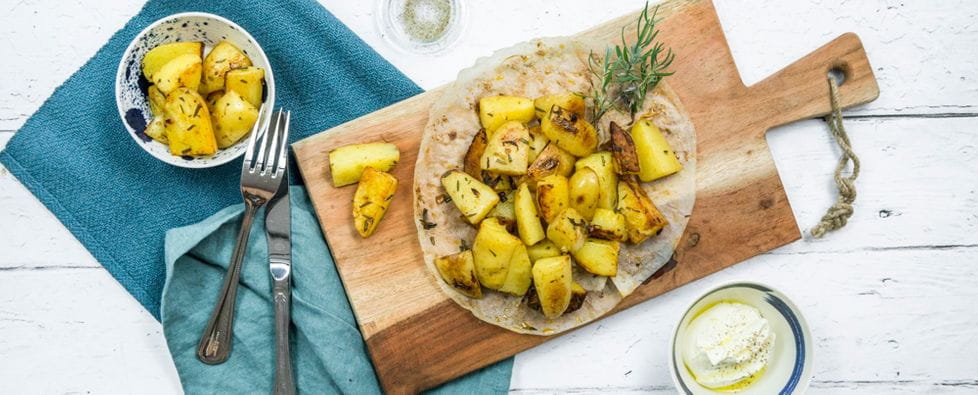
Depending on the dish, small carafes of oil, spice canisters or sauces and dips can make the image look more interesting and show how a dish can be further enhanced. Raw ingredients can also be used as decorations. Try to only use such ingredients that are used in the dish itself or which go well with the dish. For example, you can create decorations with fresh fruit or vegetables, or you could place a piece of rustic baguette or bread next to your plate.
If you like, you can give your dish an extra-fresh look by sprinkling on a little water – that makes vegetables look like they’ve come straight from the market. To make your plateful gleam even more, you can brush on a little oil. Make sure that you don’t use too much oil, as otherwise your dish may look greasy.
Professional food bloggers also like to use the available surfaces next to their plates to stage a look of “untidiness”. This means that when photographing baked goods or cakes, they may sprinkle flour, icing sugar or cocoa powder around, or chocolate curls, nuts or spices. This makes the items look like they have been freshly cooked or baked.
Professional food photographers often add a sprinkle of icing sugar to style their photos.
Tips for photographing recipes
Recipe photos should not only look beautiful and encourage others to cook them too, but they should also show what the end result of a recipe can look like if the recipe is prepared correctly. We have two more tips for you specifically for recipe photos:
- Fill the plate with an actual portion size. Depending on the dish, you can alternatively set it up as a communal plate, from which everyone can serve themselves. For your photo, keep to the portion size stated in the recipe so other users can get an impression of the quantity of food they will be cooking.
- If you want to photograph cakes, tarts or bread, for best results cut a piece or a slice so that the results are more clearly visible.
With these tips, you’re armed with all the tools you need for your next photo session! We can’t wait for your creative recipe photos and hope to see you soon in our Recipe Community! Click here to upload a recipe!
As always: If you have any questions or comments, write to us in the forum.


